I previously wrote about why I replaced Toggl with a self-built time tracker. The short version: I wanted tools my AI assistant could drive end to end, and I wanted the pieces of my business closest to revenue running on software I own. That post was the argument. This one is the walkthrough.
By the end you will see a timer turn into an emailed QuickBooks invoice without me leaving the app.
The dashboard
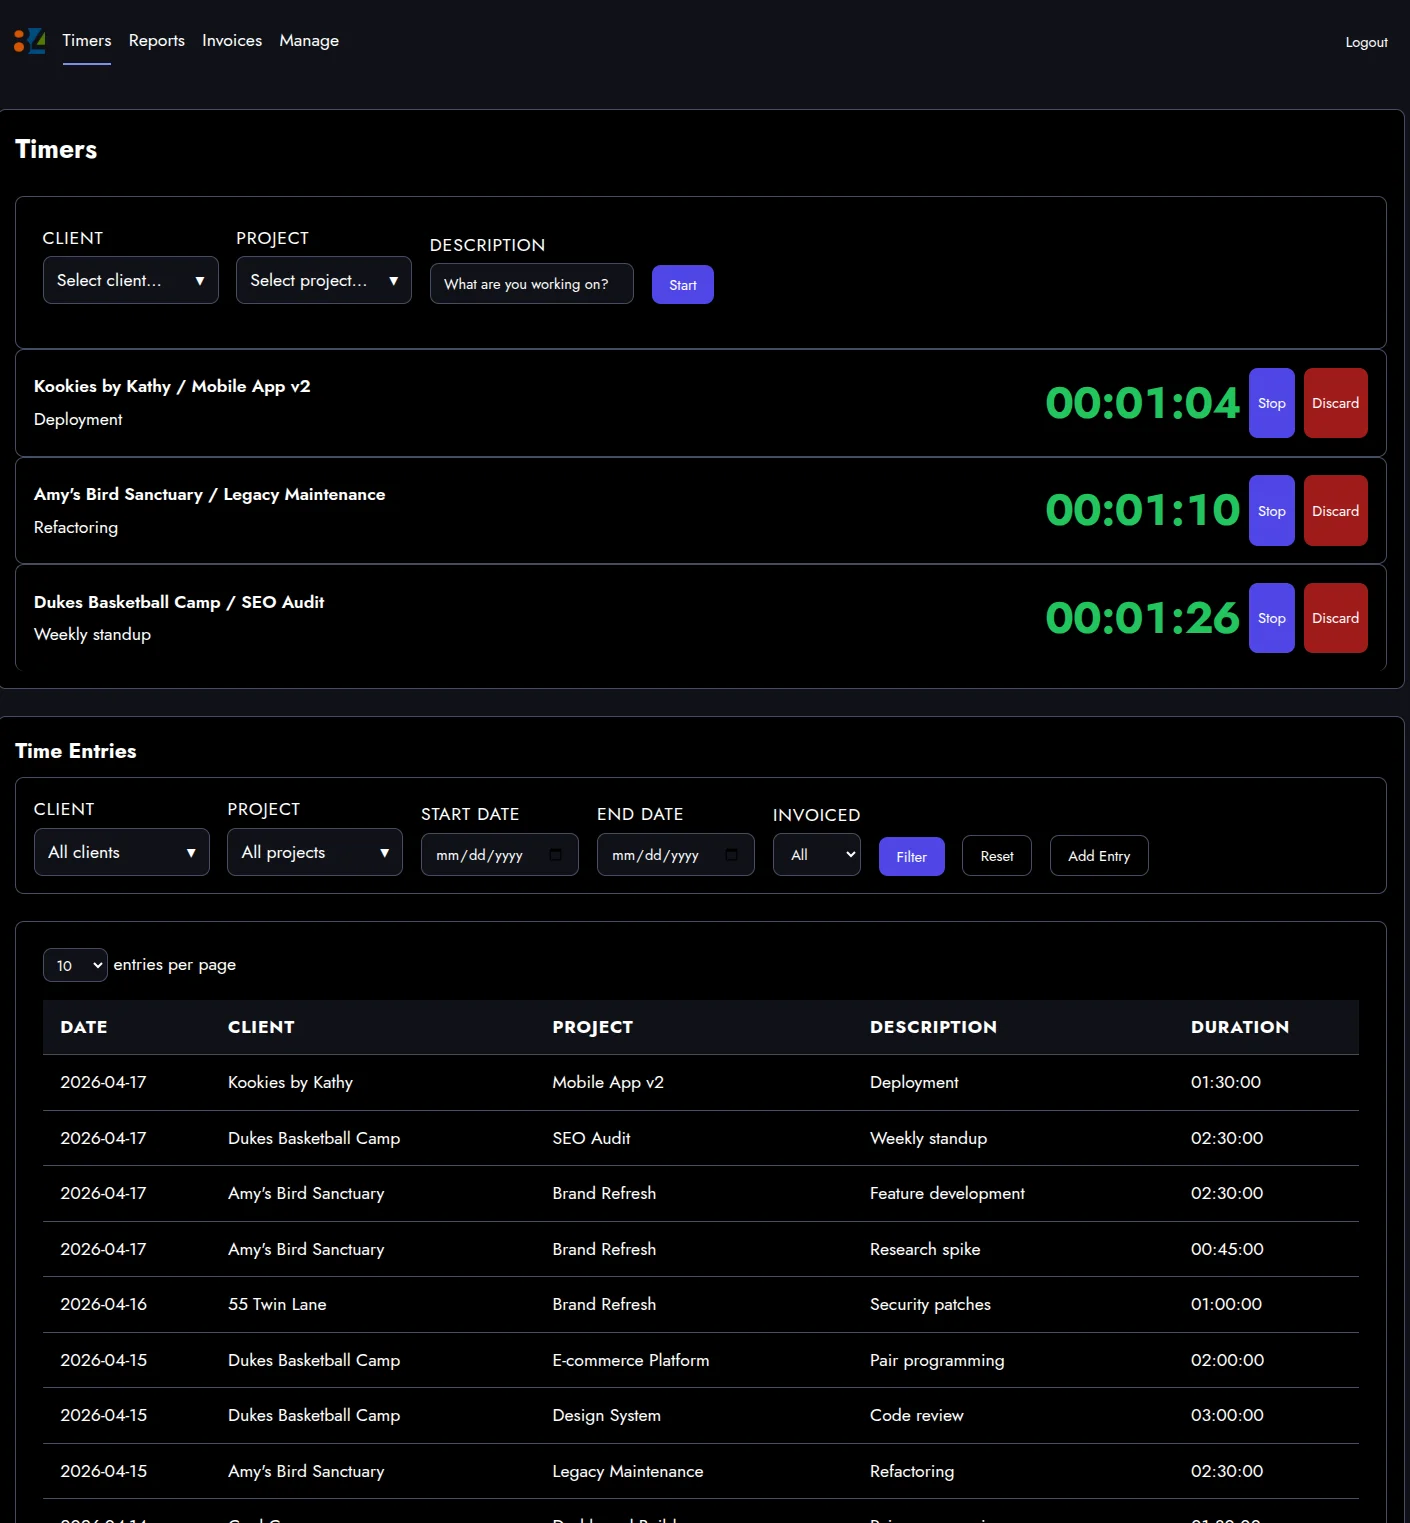
Three timers running at once for three different clients. Context switching is not a bug I work around. It is what a day actually looks like, so the tracker treats multiple live timers as a first-class feature.
Below the timers is every entry from the current period, filterable by client, project, date range, and invoiced status.
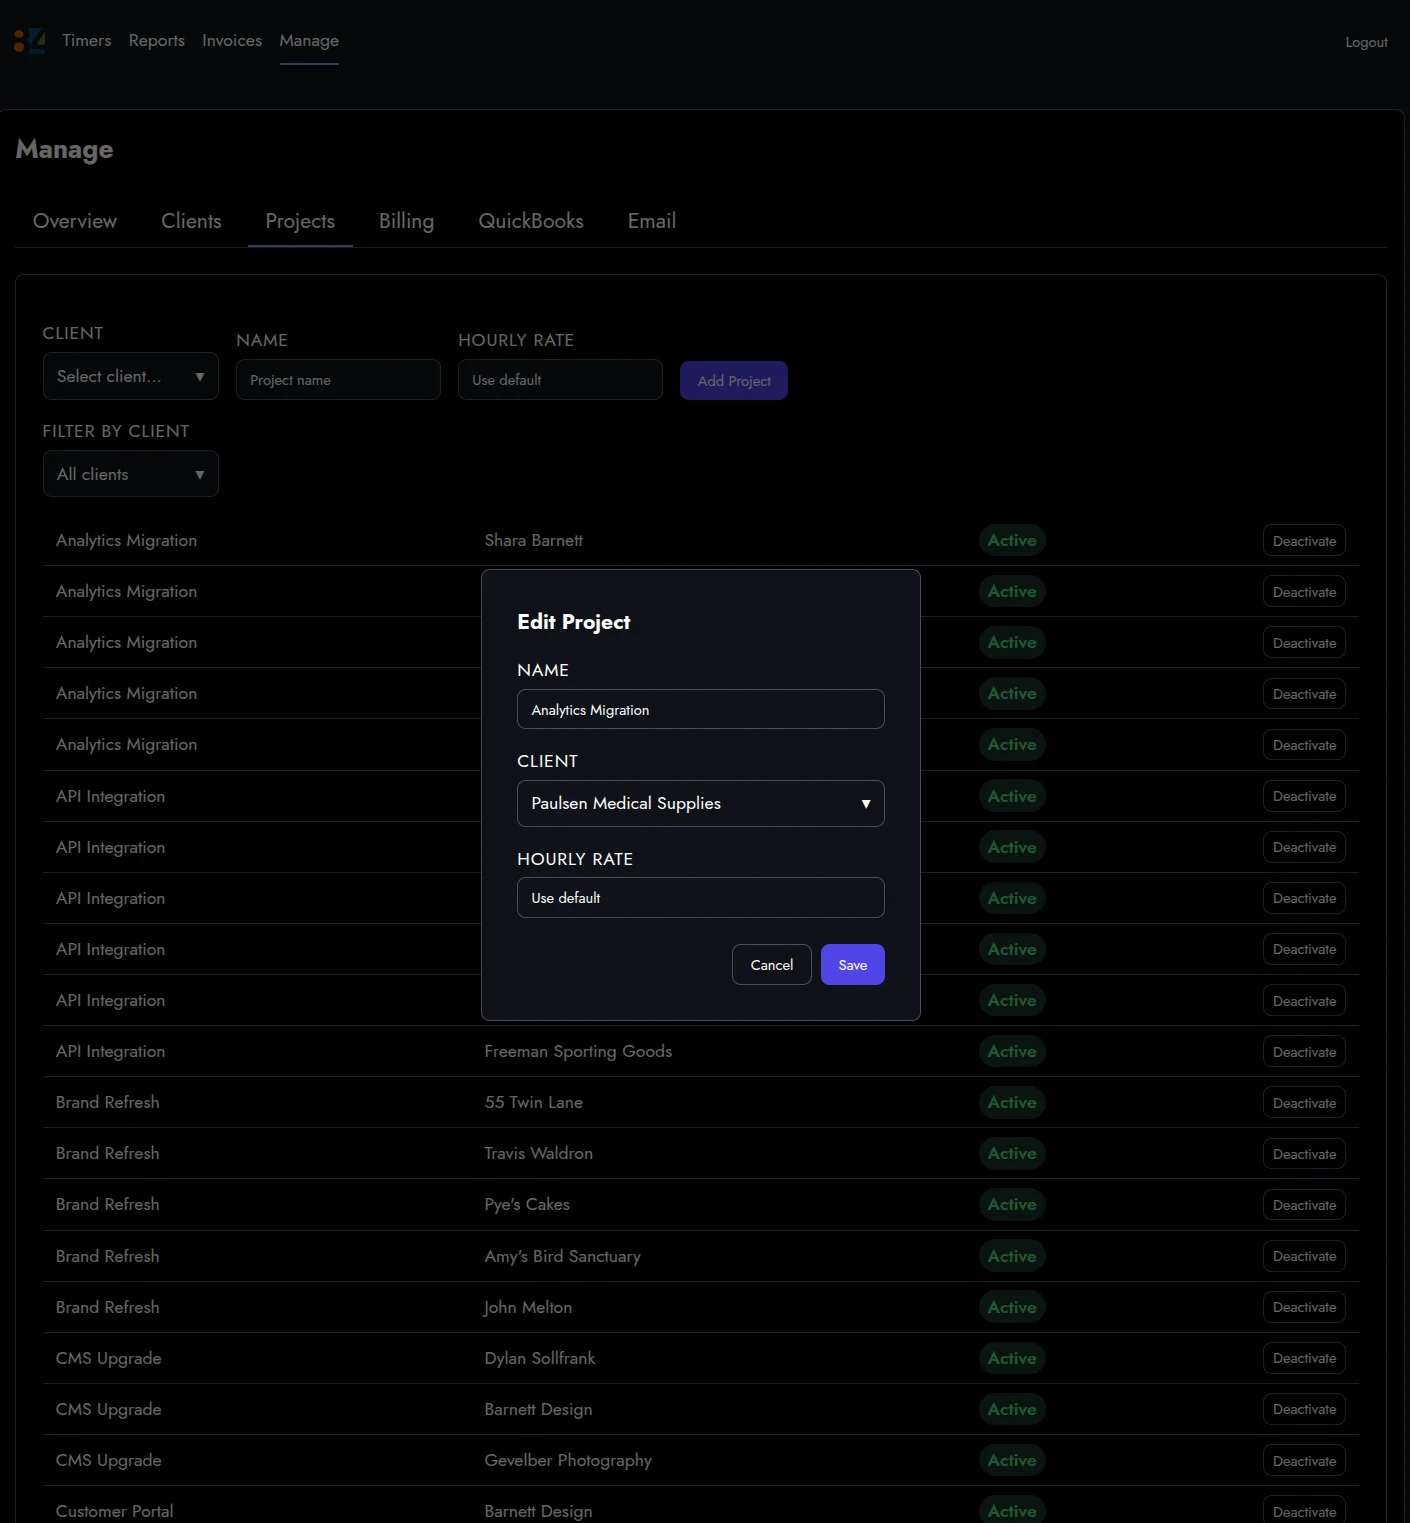
Fixing things after the fact
Timers do not always get started on time. Sometimes I forget to start one entirely. Sometimes the description I typed in a hurry is not what actually happened.
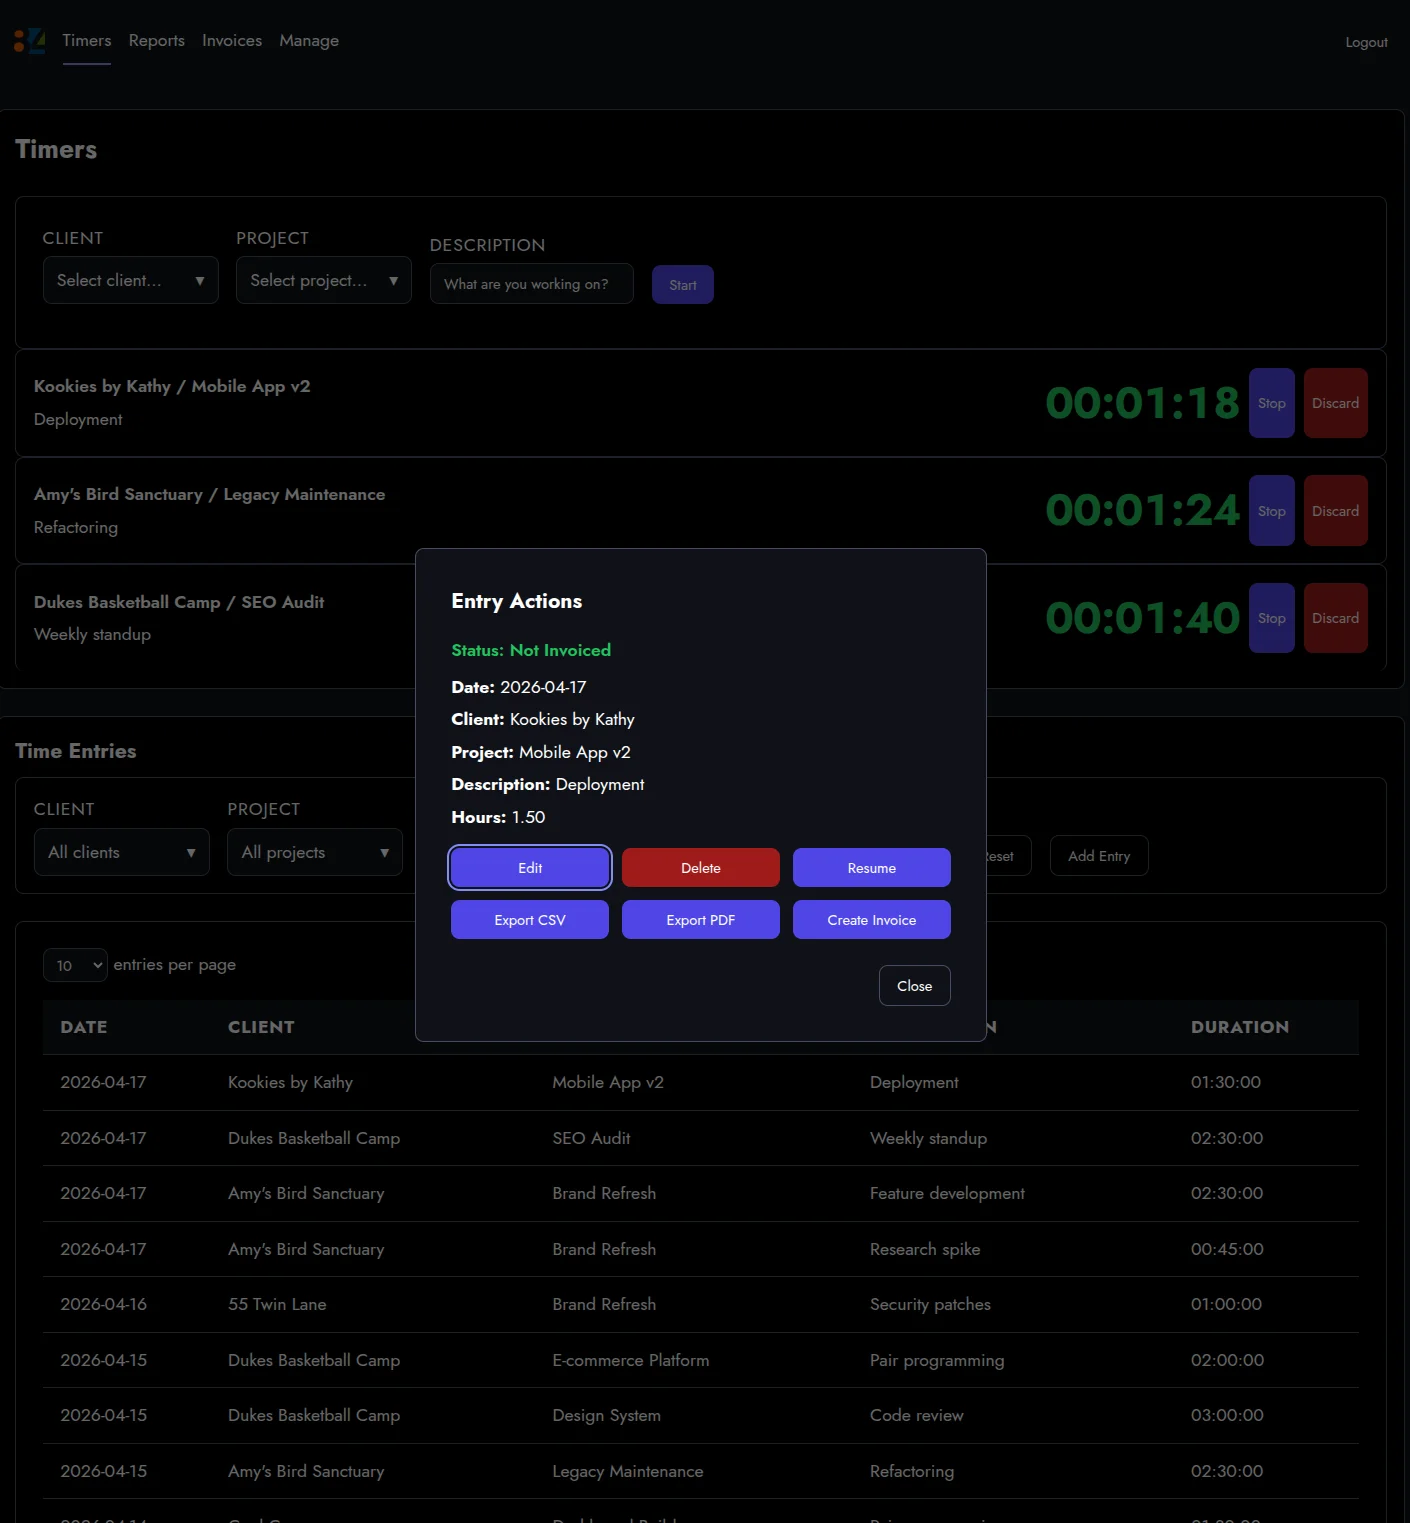
Clicking any entry opens a small menu. Edit, delete, resume the timer, export, or jump straight to invoicing.
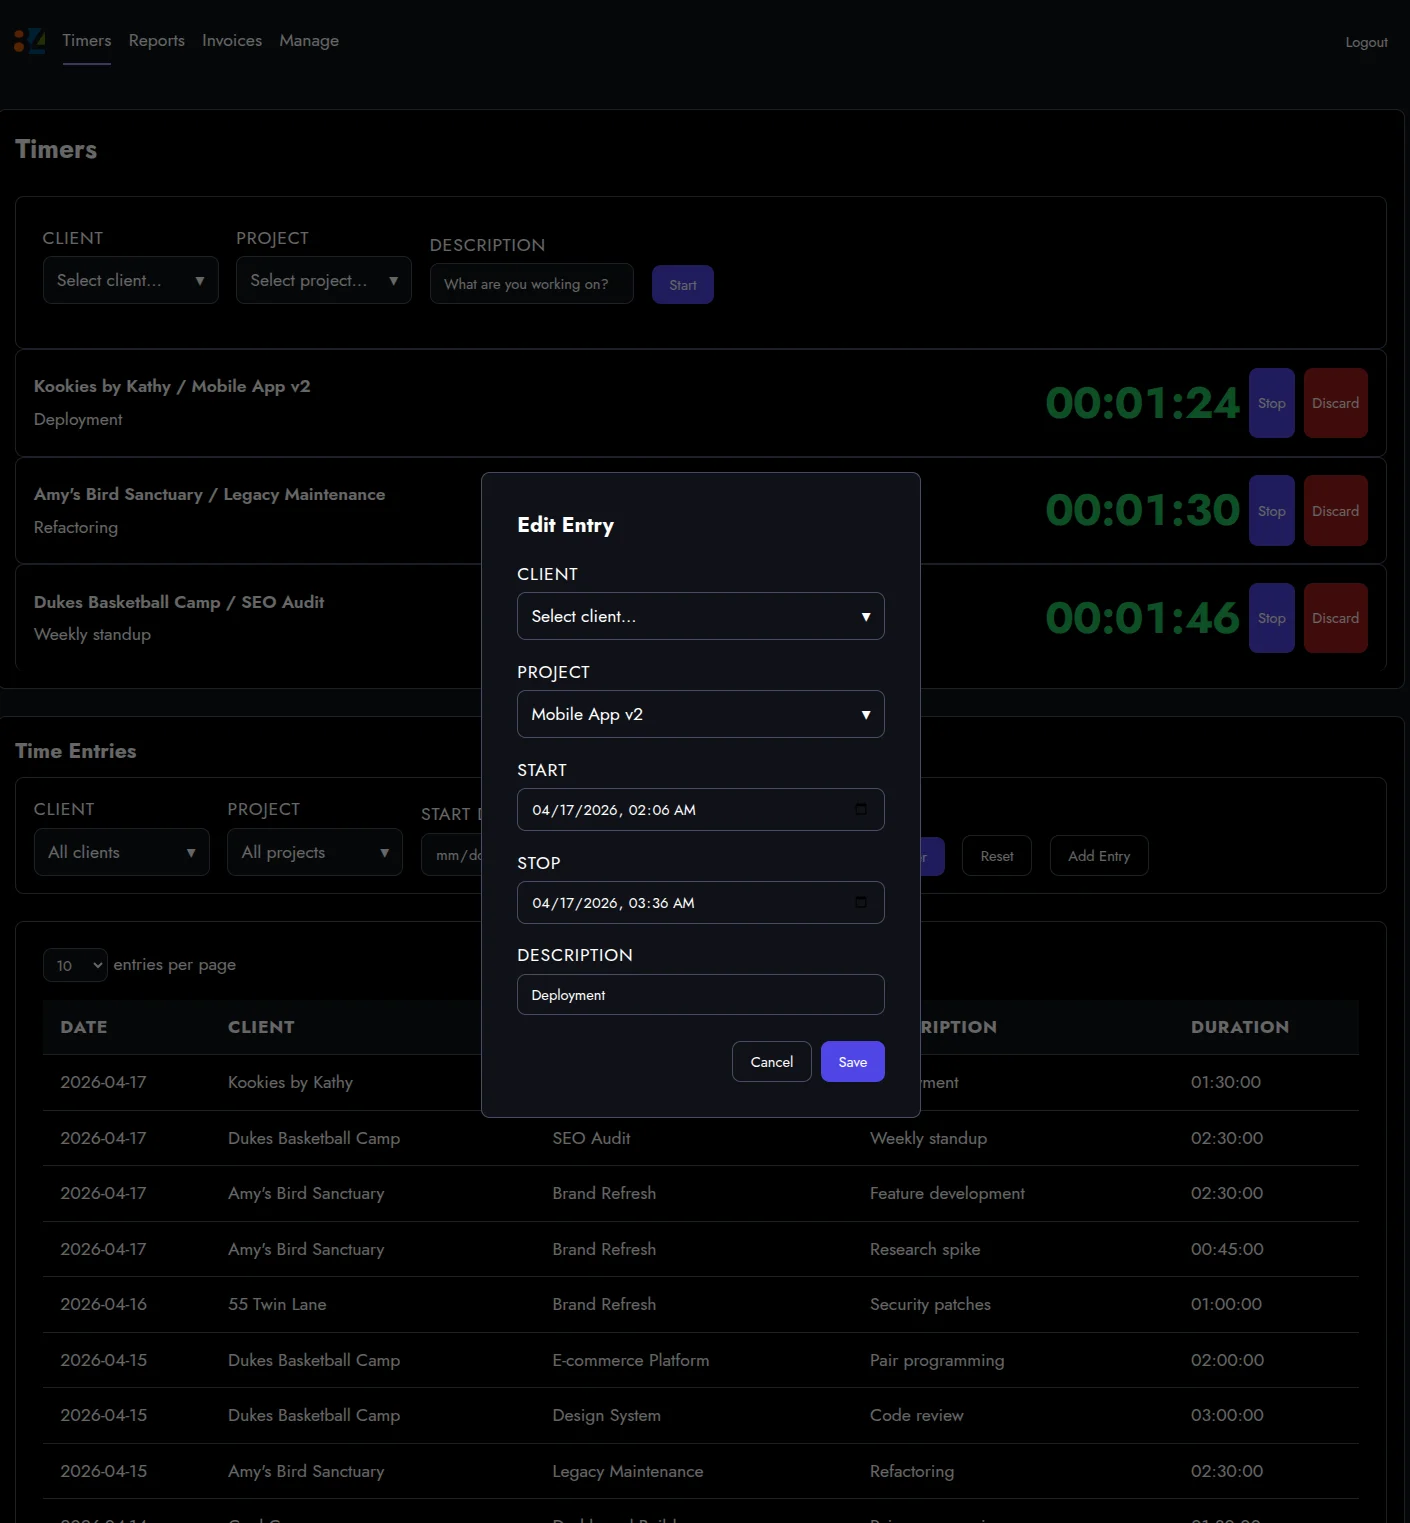
Edit opens an inline form for the client, project, start and stop times, and description. This is the boring 30% of time tracking that nobody designs well, and I wanted it to stop being a hassle.
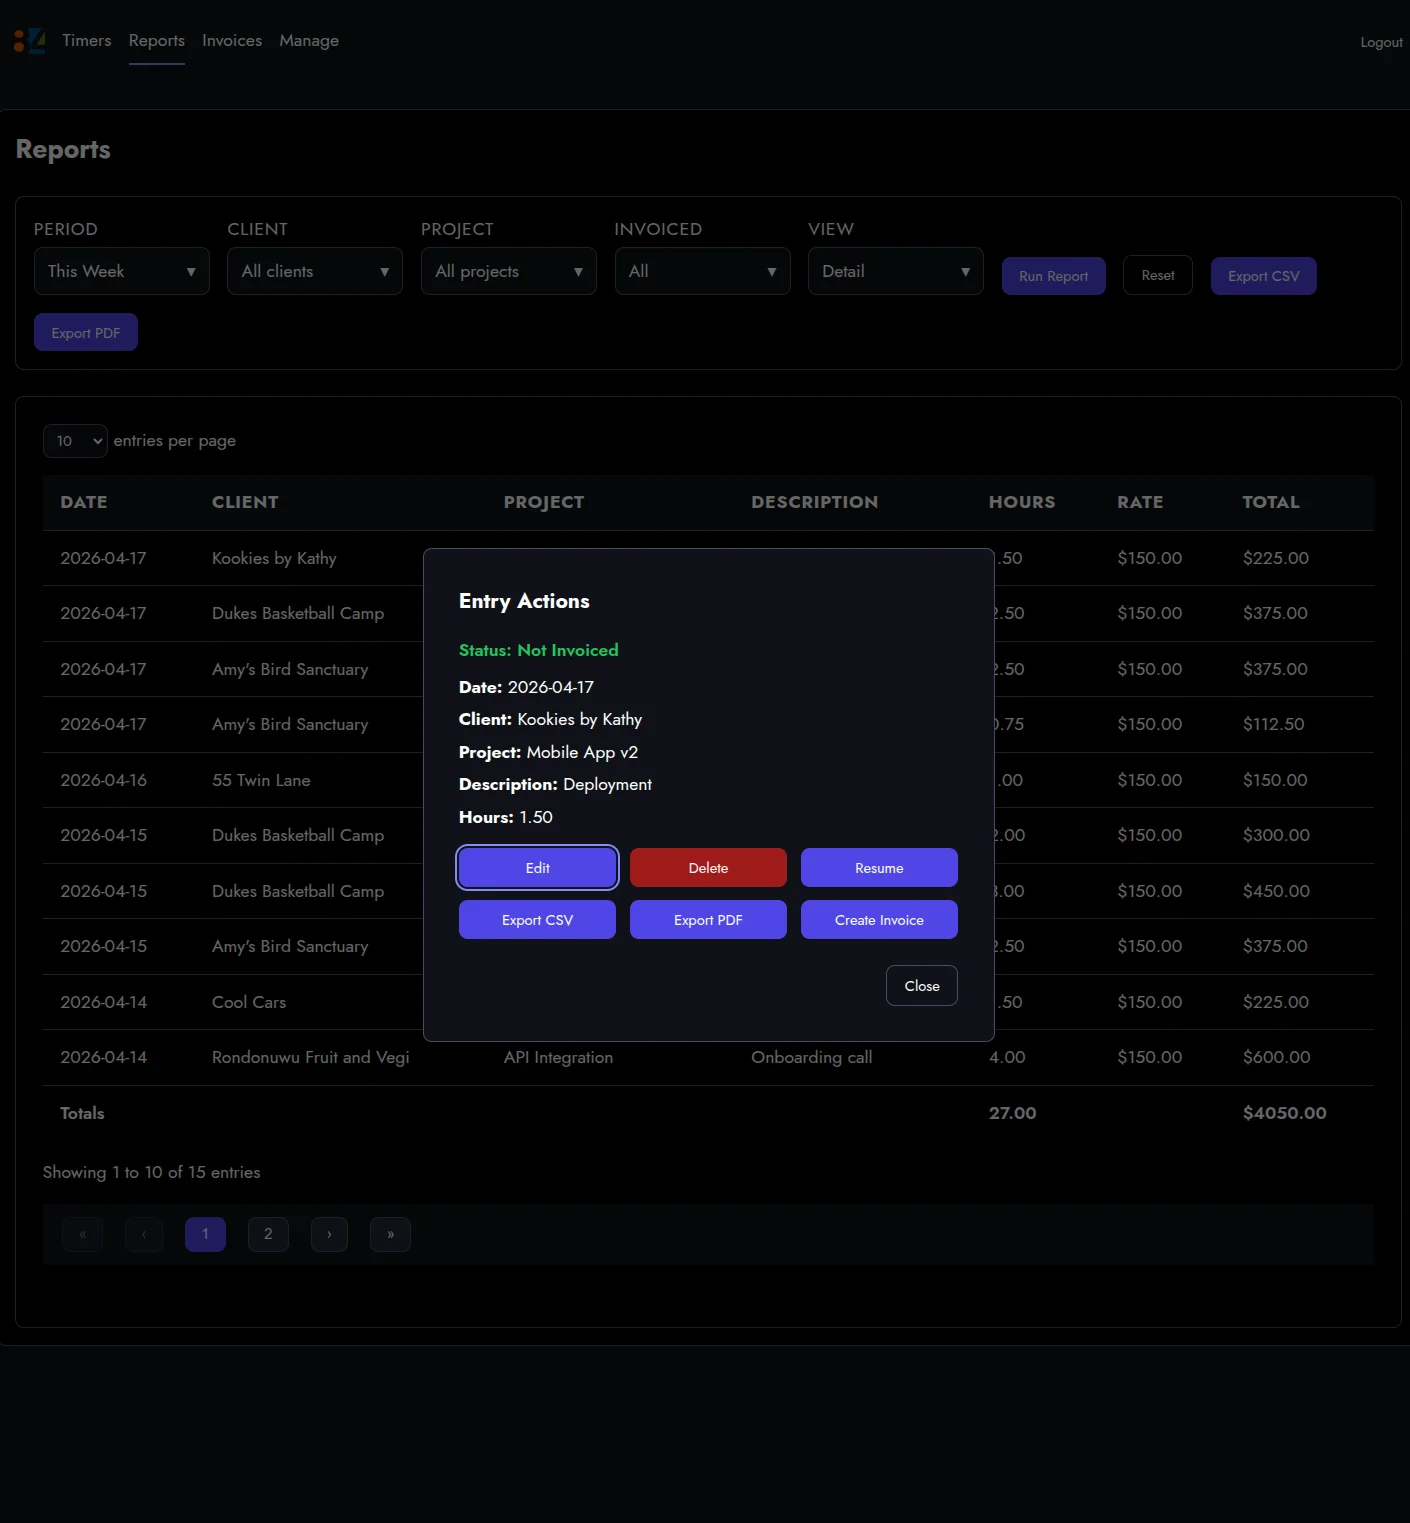
Reports that know what hours cost

This is where the app stops being a stopwatch.
Filter by any combination of period, client, project, and invoiced status. Every row has an hourly rate pulled from the client or project, and the footer shows dollar totals alongside hour totals. This week: 27 hours, $4,050.
From hour to invoice, one modal
The entry menu is the same one from the timers page, so the flow feels identical whether I am cleaning up today’s work or billing last week’s.
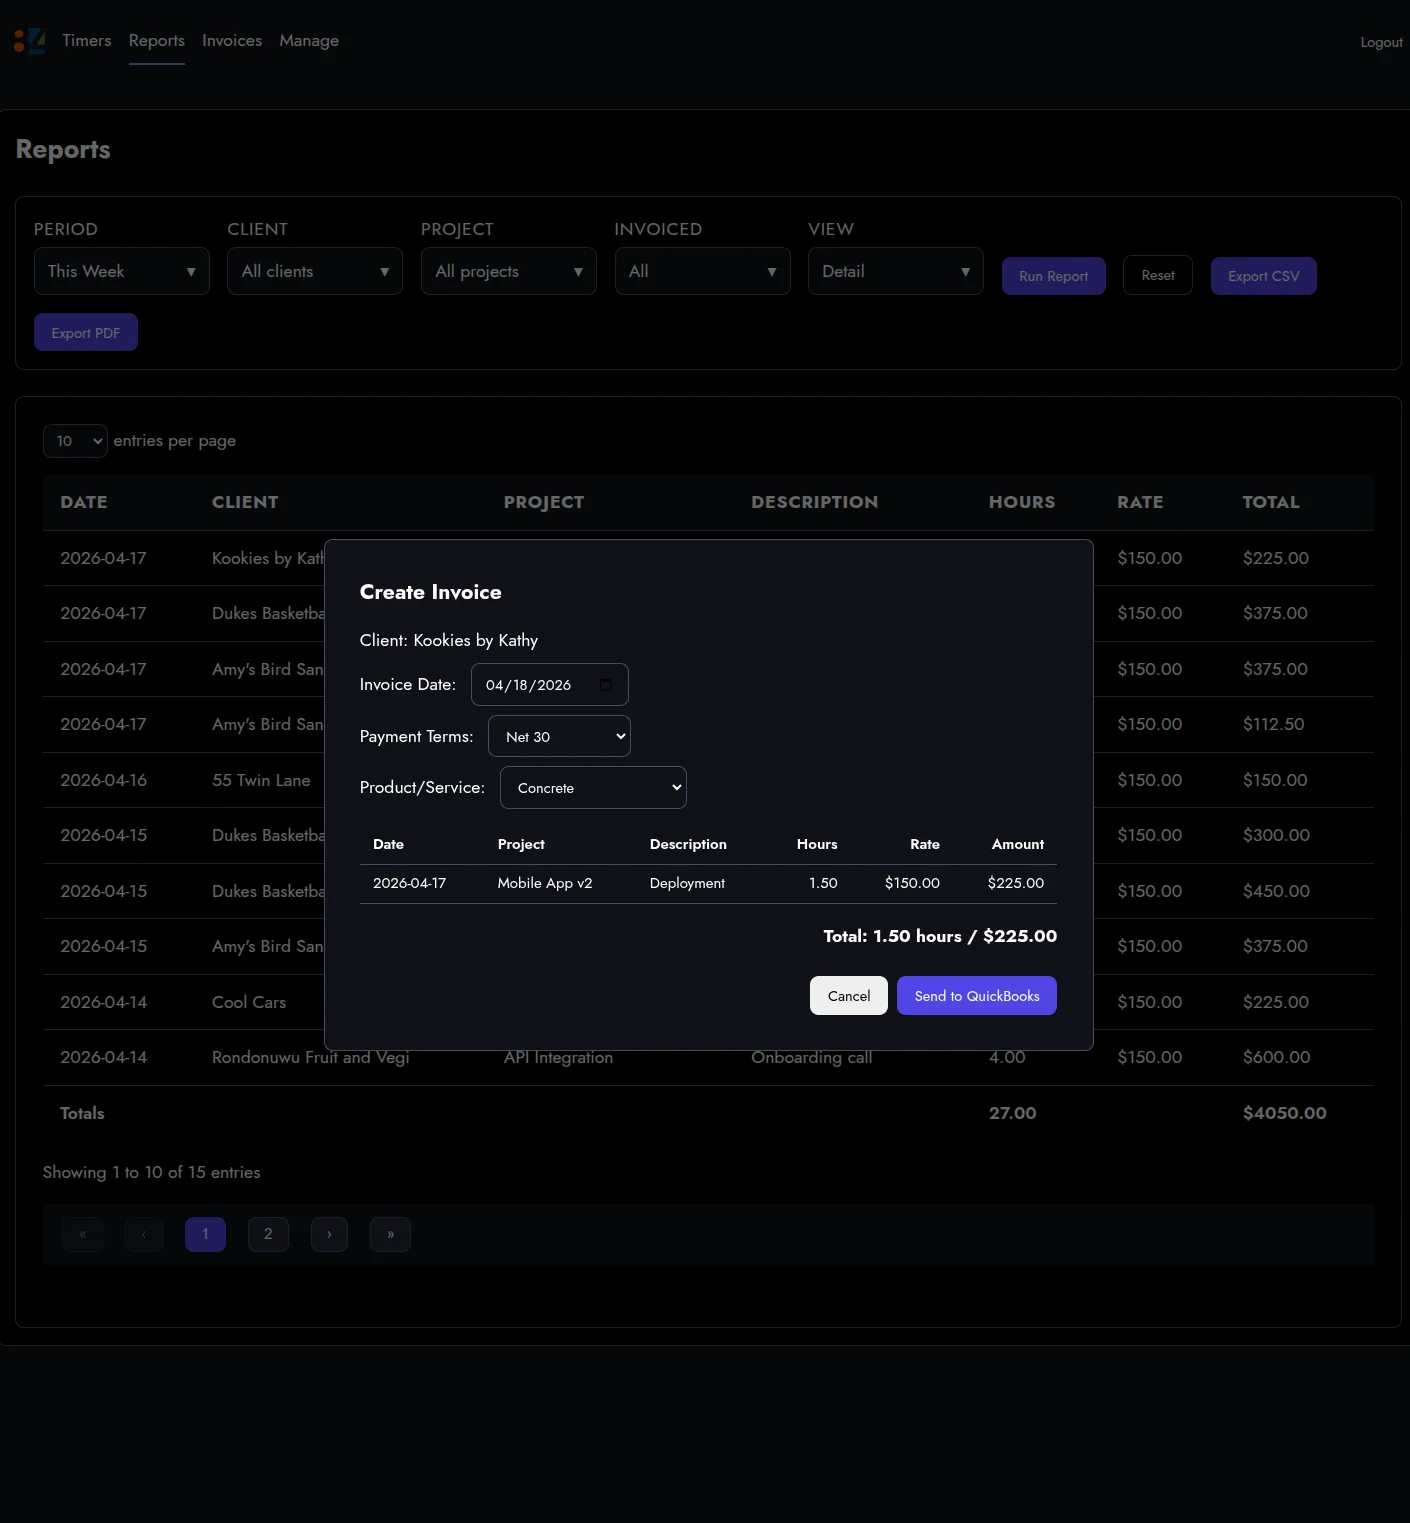
Create Invoice opens a preview showing exactly what QuickBooks is about to get. Invoice date, payment terms, the QuickBooks product or service, every line item, the total. Nothing is assumed.
Straight into QuickBooks
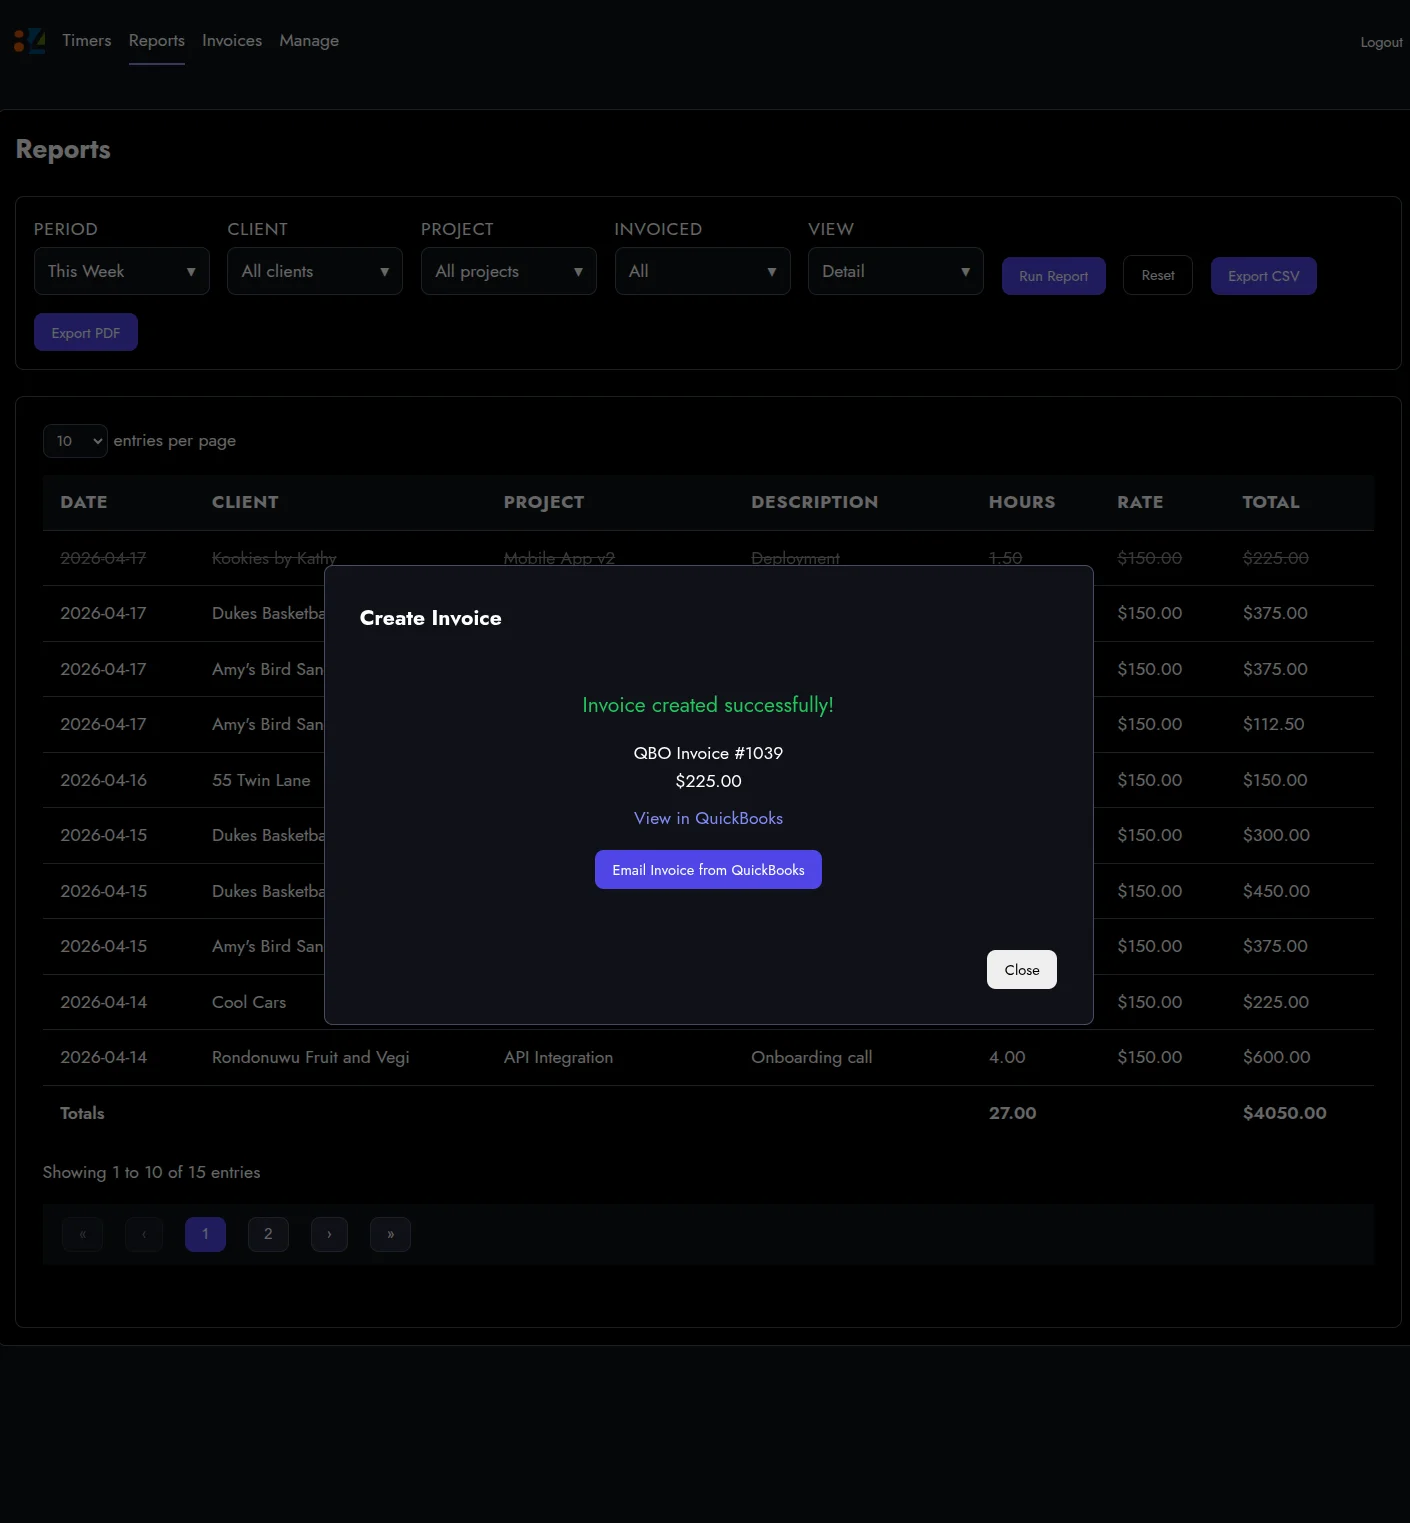
One click, and QuickBooks has invoice #1039.
The dialog gives me a link to open the invoice in QuickBooks if I want to double-check anything, and a button to email it to the client directly from QuickBooks. No copy-paste. No downloading a PDF. No switching browsers.
An invoice log that isn’t a spreadsheet
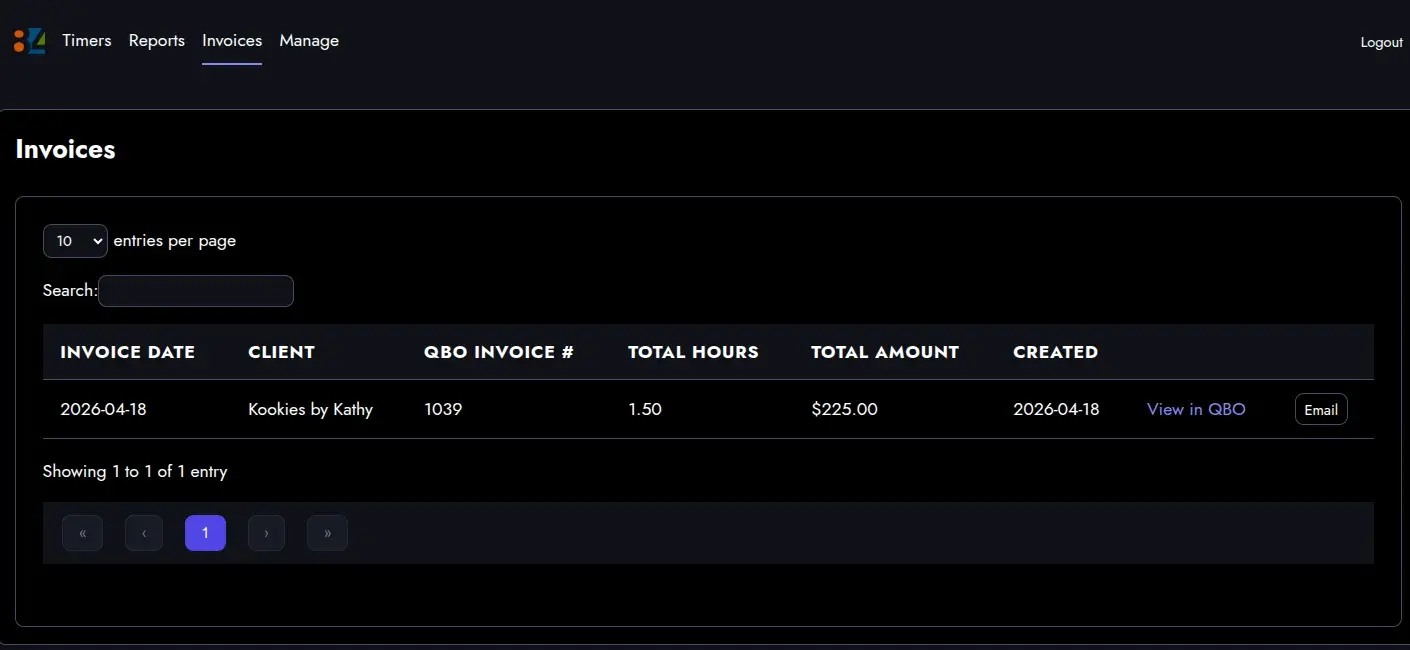
Every invoice the tracker has pushed to QuickBooks shows up on the Invoices page, searchable, with the same view-in-QuickBooks link and email button.
That was the roadmap item from the last post. Delivered.
The admin surface
The Manage area holds everything else.
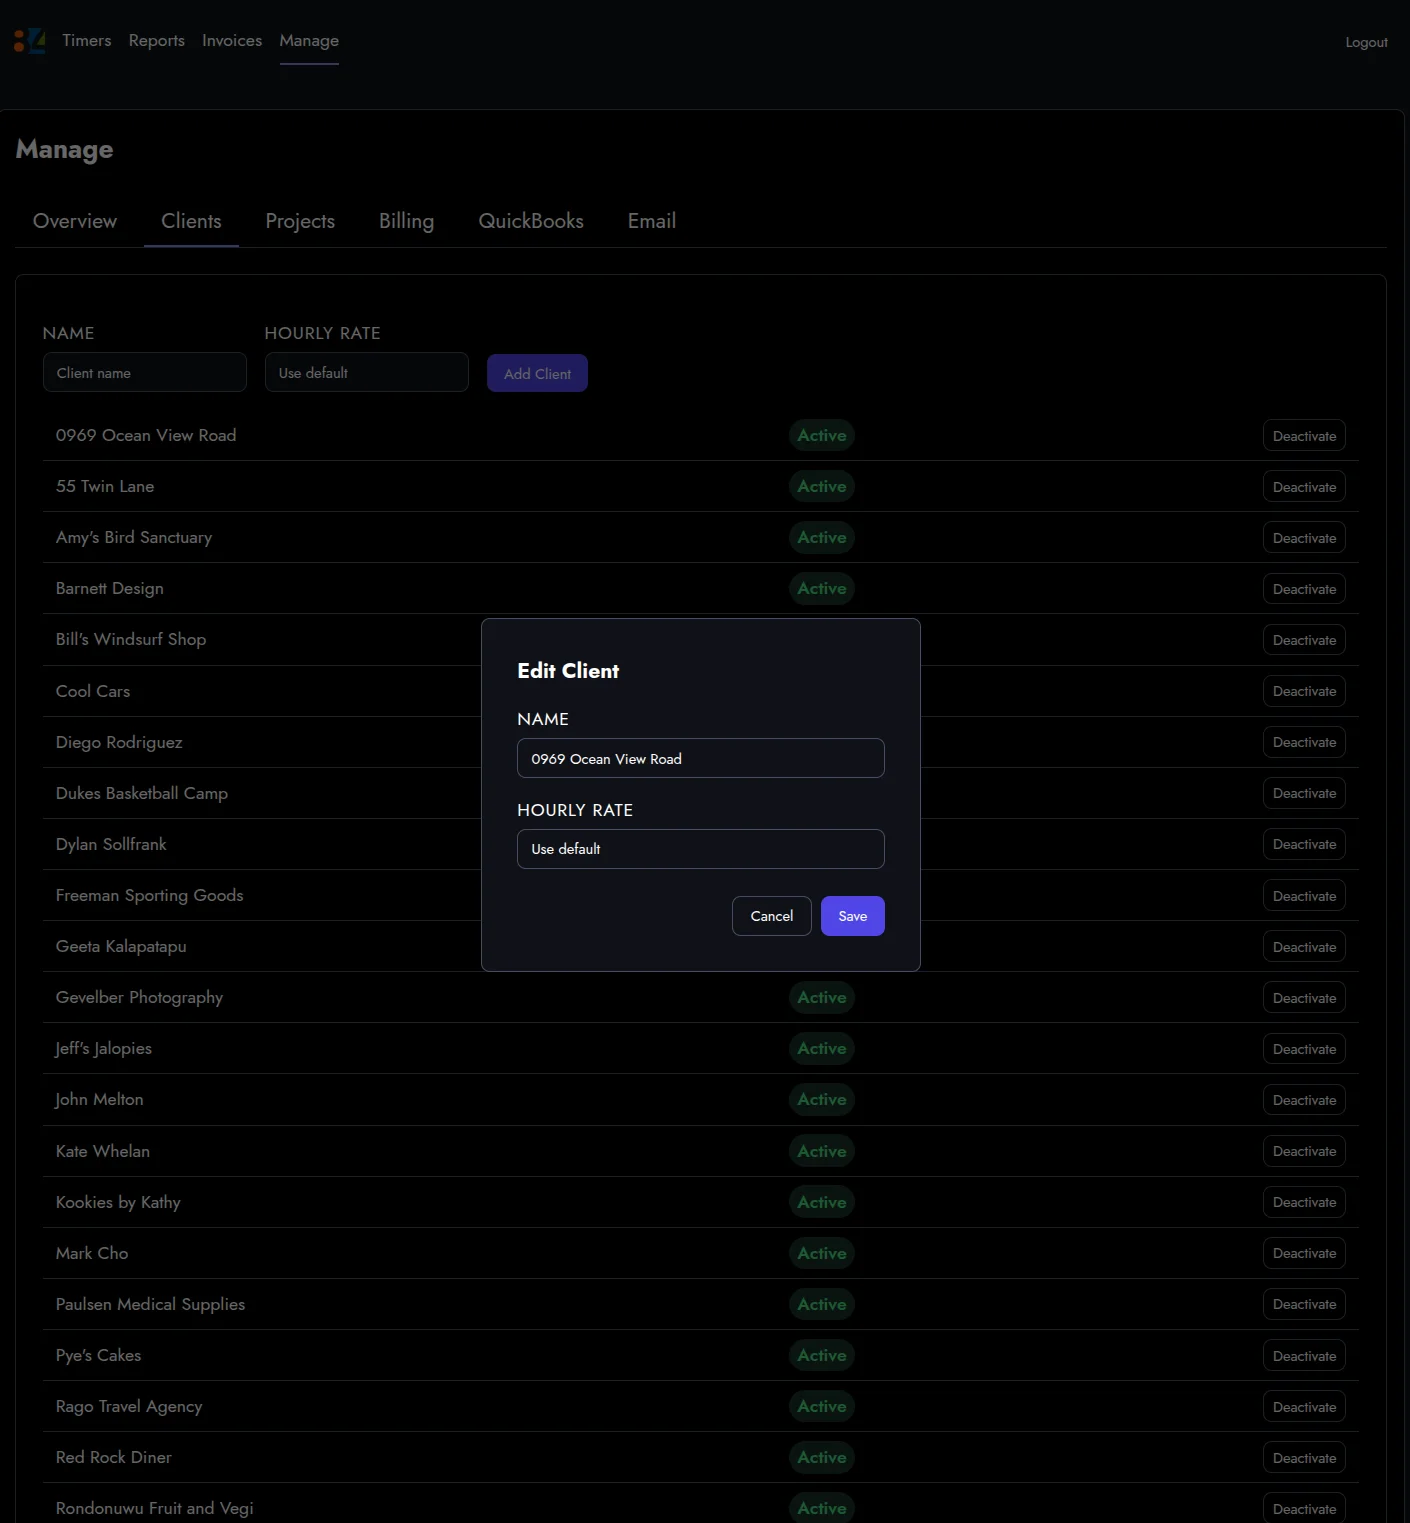
Clients have a name, an optional client-specific hourly rate, and an active or inactive status. Deactivating a client hides them from the timer dropdown without deleting any history.
Projects belong to a client and can override the rate again. So rates cascade: default, then client, then project, with the most specific winning.
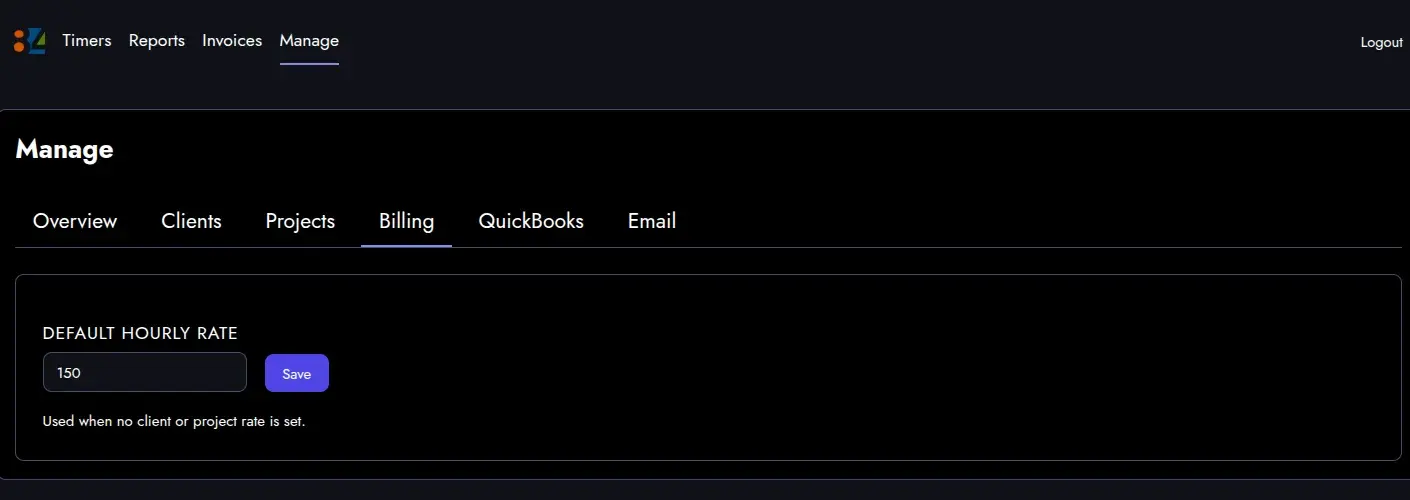
The default hourly rate lives under Billing. Used whenever a client or project has not set their own.
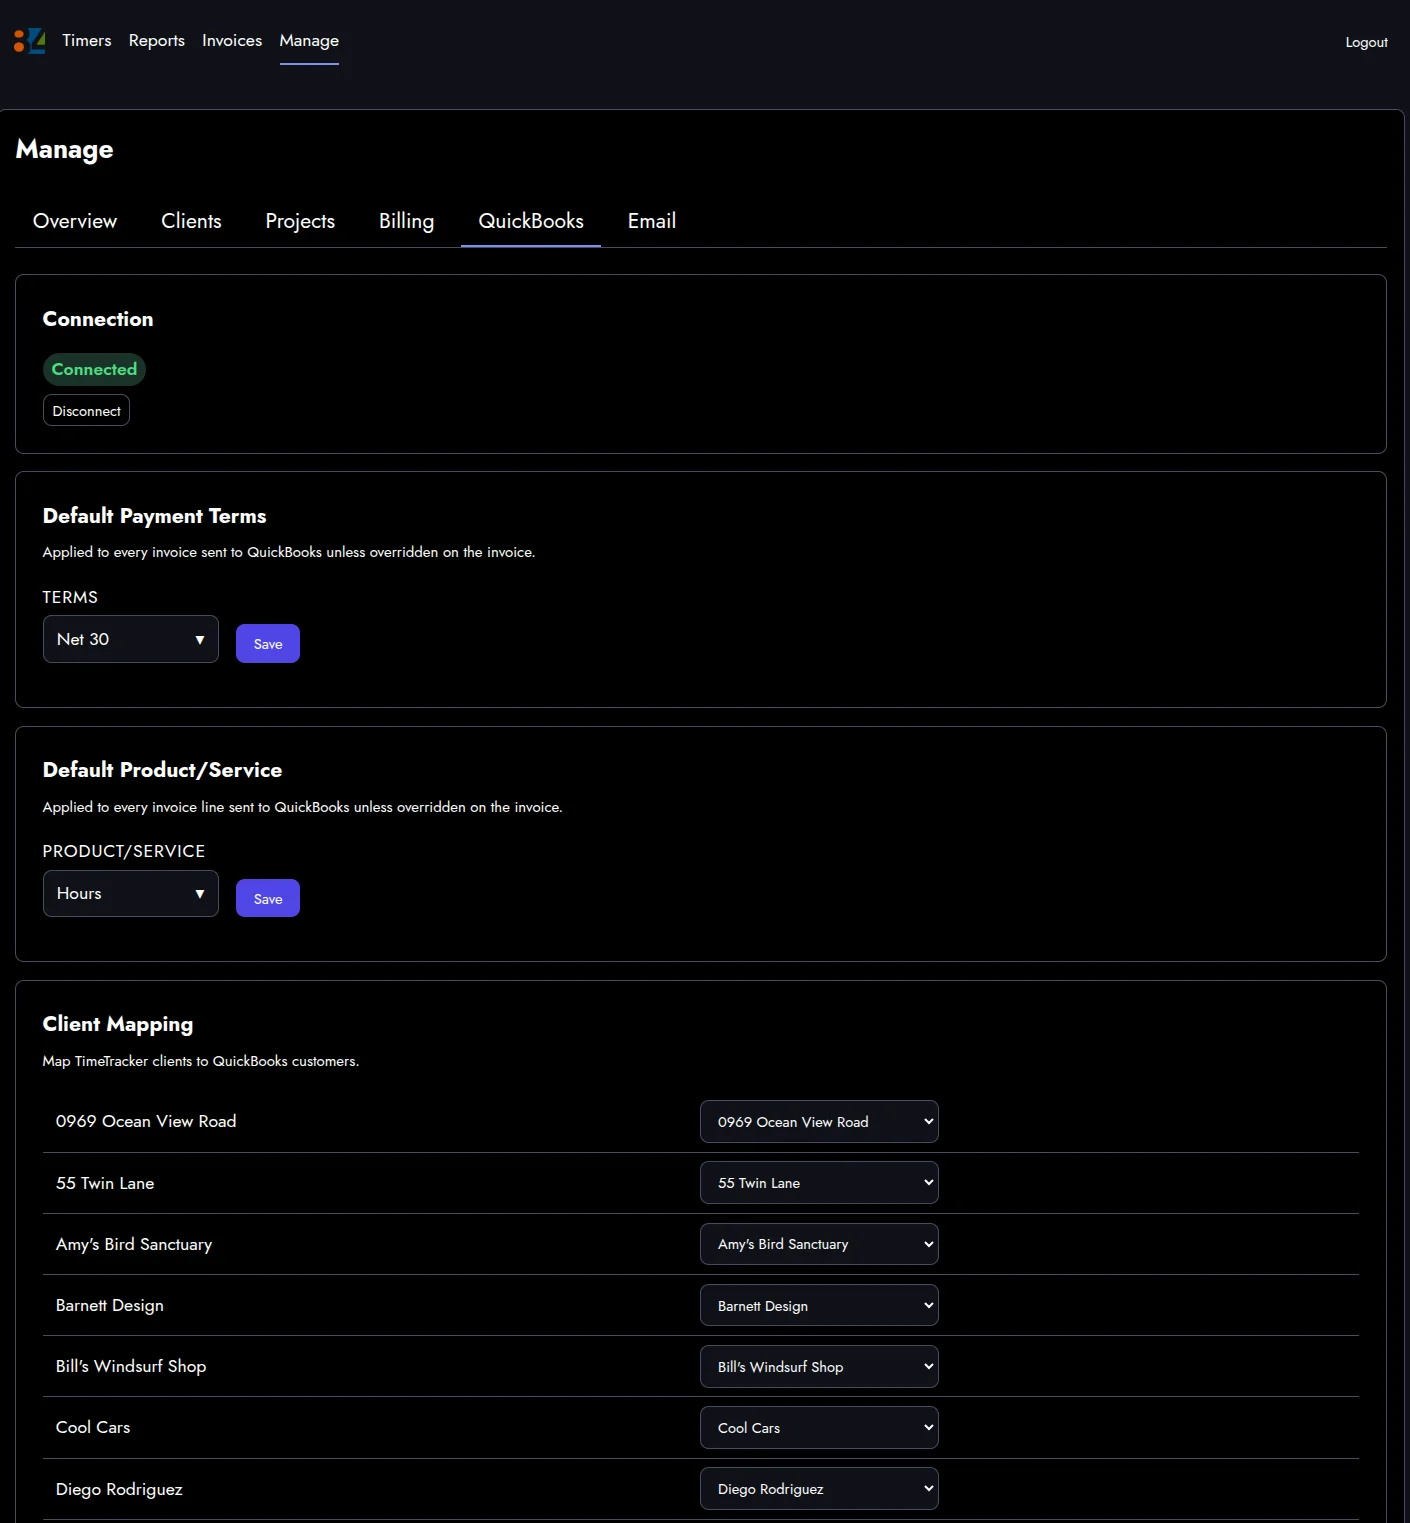
The QuickBooks tab holds the connection state, default payment terms, the default product or service, and a row for every client in the tracker mapped to the matching customer in QuickBooks. Once the mapping is set, invoices go to the right place automatically.
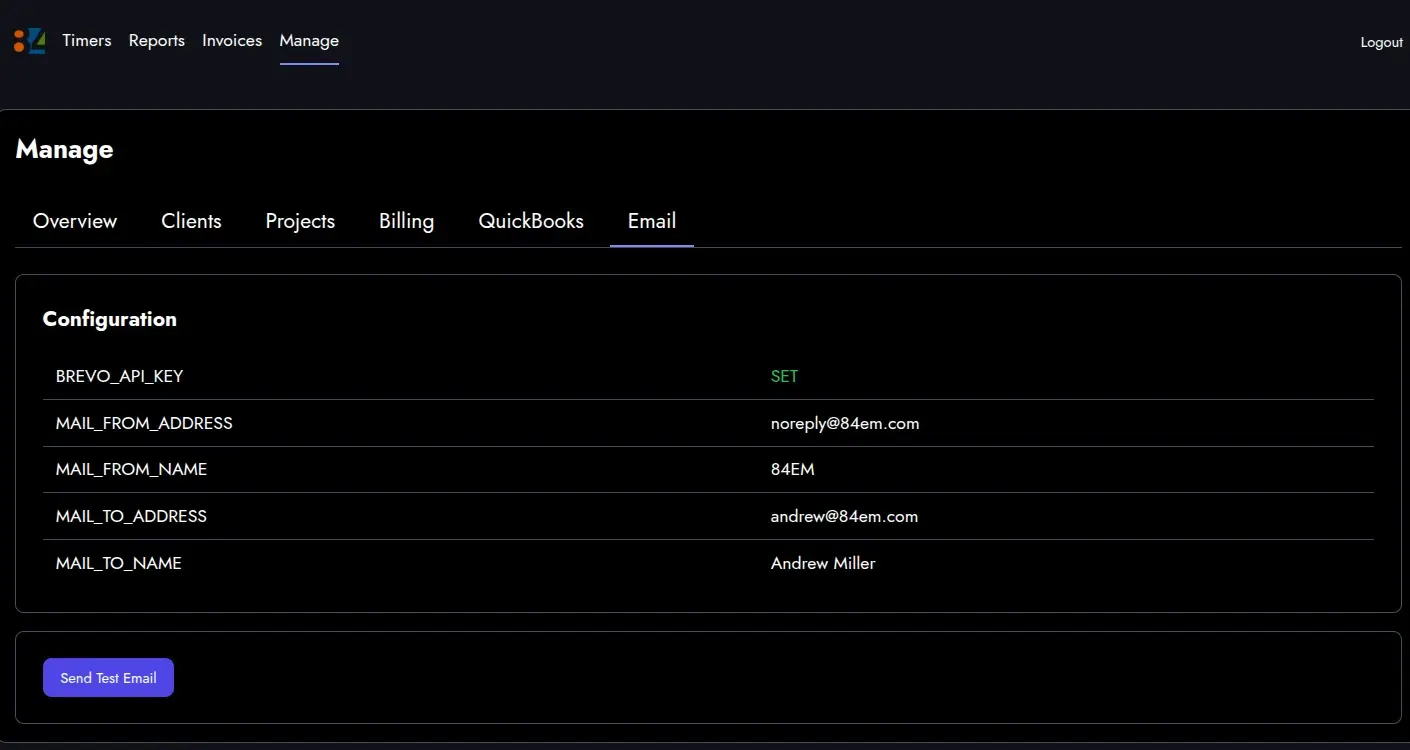
Email is the last tab. Sender address, reply-to, the key for the service that delivers the mail. A Send Test Email button because I have been burned by silently broken notification pipelines before.
The AI angle, briefly
Everything in this walkthrough maps to a function my AI assistant can call directly. “Start a timer on the Kookies by Kathy mobile app.” “Run me a weekly summary for all clients.” “Draft the invoice for last week’s Dukes Basketball Camp hours and email it.”
That is the part I could not buy. The screenshots above are what the pipeline looks like in a browser. The same pipeline runs inside a Claude Code conversation when I ask for it.
What’s next
Integrations with Trello and my internal KB.